
I’m always on the hunt for desserts that satisfy both my chocolate cravings and my love for fruit, and this cherry chocolate milkshake hits all the right notes. The combination of frozen cherries and rich chocolate creates a perfectly balanced sweet treat that feels indulgent without being overwhelming. There’s something magical about that first sip when the creamy vanilla ice cream meets the tart cherry flavor. Want to know my secret for taking this milkshake from good to absolutely unforgettable?
Why You’ll Love this Decadent Cherry Chocolate Milkshake
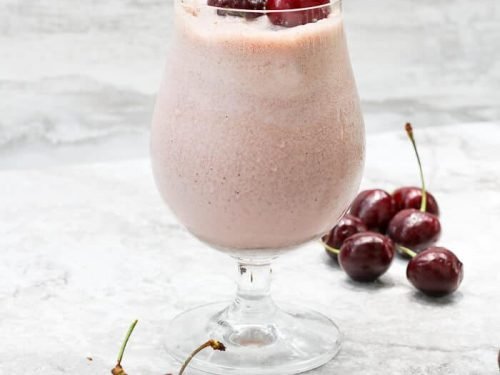
While most desserts require baking skills or fancy equipment, this cherry chocolate milkshake delivers pure indulgence with minimal effort. I’m talking about the perfect balance of sweet vanilla ice cream, tart cherries, and rich chocolate chunks that melt in your mouth with each sip.
Isn’t it wonderful when something this delicious takes just minutes to prepare? The combination of frozen cherries and chocolate creates a flavor profile that’s both sophisticated and nostalgic. Plus, you can easily adjust the thickness to your preference. Need something to cool you down on a hot day? This milkshake is your new best friend.
What Ingredients are in Decadent Cherry Chocolate Milkshake?
Creating this indulgent treat requires just a handful of simple ingredients that combine to make something truly special.
- 6 large scoops of vanilla ice cream
- 1 cup frozen cherries
- 1 cup milk
- 1/2 teaspoon vanilla extract
- 2 ounces chocolate bar, chopped
The quality of your ingredients will definitely impact the final result, so I recommend using good vanilla ice cream and real chocolate bars rather than chocolate chips for the most luxurious texture and flavor profile.
How to Make this Decadent Cherry Chocolate Milkshake
Creating this luscious milkshake is wonderfully simple, and the results are absolutely worth the minimal effort. Begin by adding 1 cup milk, 1 cup frozen cherries, and 1/2 teaspoon vanilla extract to your blender. This first step is imperative because it helps break down those frozen cherries before adding the ice cream, which prevents your blender from struggling with the thicker ingredients right away. Pulse these ingredients until the cherries are mostly broken down, creating that gorgeous pink base.
Next, add your 6 large scoops of vanilla ice cream to the blender. If you have time, letting the ice cream soften slightly on the counter for about 5 minutes can make for an even smoother blend. Process everything until you achieve that perfect milkshake consistency, which should take about 30-45 seconds depending on your blender. Need to adjust the texture? No problem. If it’s too thick to your liking, add a splash more milk. Too thin? Drop in another scoop of ice cream.
Finally, add 2 ounces of chopped chocolate bar to the mixture and pulse just a few times. We’re looking for tiny chocolate flecks throughout the shake, not completely blended chocolate—those little bursts of chocolate are what make each sip so delightful. For an extra special treat, consider warming chocolate sauce on an electric griddle premium to drizzle over the top of your milkshake.
What to Serve with Decadent Cherry Chocolate Milkshake
Because this rich cherry chocolate milkshake already stands as a decadent treat, pairing it with complementary foods can transform it from a simple beverage to the centerpiece of a delightful dessert experience.
I love serving mine with warm chocolate chip cookies for that classic milk-and-cookies vibe, but with a grown-up twist. Butter cookies or shortbread also provide a nice textural contrast.
Want something lighter? Fresh berries on the side can cut through the richness. Feeling extra indulgent? A slice of dark chocolate cake makes this an over-the-top dessert duo that’ll have everyone asking for the recipe.
Leftovers and Storage for this Decadent Cherry Chocolate Milkshake
While milkshakes taste best when freshly made, sometimes you might find yourself with leftover cherry chocolate goodness that’s too precious to waste.
I recommend transferring any remaining milkshake to an airtight container and storing it in the freezer, not the refrigerator. When you’re ready to enjoy it again, let it thaw for about 10 minutes, then give it a quick stir or another brief blend. The texture won’t be identical to fresh—those chocolate bits might sink and the consistency could be icier—but the flavor will still be delicious.
Just don’t wait longer than 1-2 days, or you’ll lose that magical cherry-chocolate balance.
Decadent Cherry Chocolate Milkshake Substitutions and Variations
Even though this cherry chocolate milkshake recipe is perfect as-is, you might find yourself craving a twist or needing to work around missing ingredients. I’m all about making recipes your own.
Can’t find frozen cherries? Fresh ones work beautifully, or try using cherry preserves for an intense flavor. Dairy-free? Swap in almond milk and coconut ice cream. The chocolate component is flexible too—dark chocolate creates a more sophisticated flavor, while white chocolate pairs divinely with the cherries for a sweeter treat.
For a grown-up version, I sometimes add a splash of kirsch or cherry liqueur.
Final Thoughts
This cherry chocolate milkshake has become my go-to treat whenever I need something sweet and satisfying. There’s something magical about the combination of creamy vanilla ice cream, tart cherries, and rich chocolate that just works perfectly together.
I love how versatile this recipe is, too. Want it thicker? Add more ice cream. Prefer it more chocolatey? Toss in extra chocolate chunks. The beauty is in making it your own.
Remember to let your ice cream soften slightly before blending for that perfect texture. Trust me, your patience will be rewarded with milkshake perfection.
If you’re feeling nostalgic, consider trying homemade pudding pops for another delicious frozen treat option that requires just a few simple ingredients.