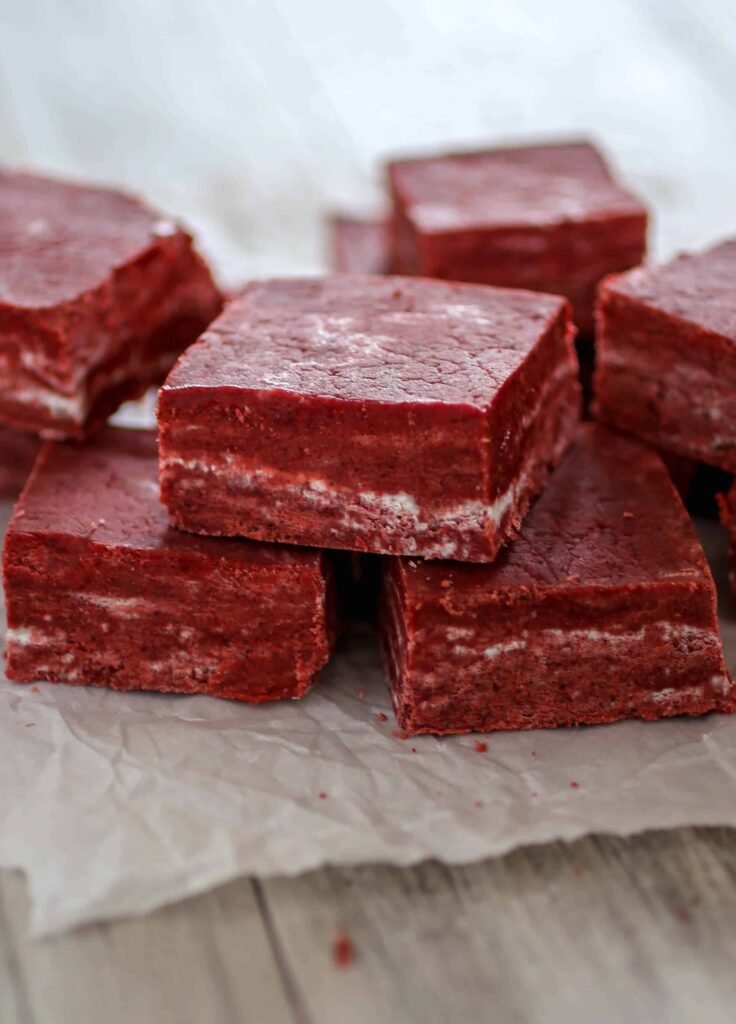
I’m so excited to share this Irresistible Red Velvet Fudge recipe with you today. It’s one of those magical treats that looks like you spent hours in the kitchen, when really it takes just minutes to whip up.
With only four ingredients and no candy thermometer needed, even kitchen novices can nail this vibrant, creamy dessert.
The rich red color makes it perfect for holidays, but honestly, who needs an excuse for fudge? Wait until you see how the white chocolate transforms into something utterly divine…
Why You’ll Love this Irresistible Red Velvet Fudge
This red velvet fudge is about to become your new favorite treat. It combines the classic flavor of red velvet cake with the rich, creamy texture of homemade fudge—all without turning on your oven.
What’s not to love? It only requires four simple ingredients and comes together in minutes. The vibrant red color makes it perfect for holidays, Valentine’s Day, or anytime you need a sweet pick-me-up.
The best part? Unlike traditional fudge that requires candy thermometers and precise timing, this recipe is practically foolproof.
Just melt, mix, chill, and you’re done. Who knew something so impressive could be so easy?
What Ingredients are in Irresistible Red Velvet Fudge?
This simple yet decadent fudge requires just a handful of ingredients that come together to create that distinctive red velvet flavor we all know and love.
- 12 ounces white baking chocolate
- 3/4 cup heat-treated red velvet cake mix
- 14 ounces sweetened condensed milk
- Sprinkles (optional, for decoration)
When shopping for these ingredients, quality matters—especially for the white chocolate, which forms the base of your fudge. Look for real white chocolate with cocoa butter listed in the ingredients for the smoothest, creamiest texture possible.
How to Make this Irresistible Red Velvet Fudge
Making this luscious red velvet fudge couldn’t be simpler, and the results are absolutely worth the minimal effort. Start by melting 12 ounces of white baking chocolate in a microwave-safe bowl, working in 30-second intervals and stirring between each until smooth and glossy.
Patience is key here—microwaving white chocolate for too long can cause it to seize up, and nobody wants a bowl of grainy, unusable chocolate. Trust me, that extra minute of careful melting makes all the difference.
Once your white chocolate is perfectly melted, it’s time to stir in ¾ cup of heat-treated red velvet cake mix and 14 ounces of sweetened condensed milk. The mixture will transform before your eyes, taking on that gorgeous red velvet hue that makes this fudge so irresistible.
Pour the velvety mixture into an 8×8-inch pan lined with parchment paper (this step is indispensable for easy removal later), and spread it evenly with a spatula.
For an even more indulgent treat, you could prepare batches of this fudge using a premium electric griddle to maintain the perfect temperature for melting chocolate.
Want to add a bit of festive flair? Sprinkle the top with colorful sprinkles while the fudge is still wet—perfect for holidays or special occasions.
The hardest part? Waiting for it to set. Pop your pan into the refrigerator for at least an hour, though longer is even better if you can resist the temptation.
When the fudge is completely firm, lift it out of the pan using the parchment paper edges, and use a sharp knife to cut it into squares.
For the cleanest cuts, wipe your knife between slices with a warm, damp cloth. Seriously, who knew something this impressive could come together with just four ingredients and practically no effort?
What to Serve with Irresistible Red Velvet Fudge
Nothing elevates a sweet treat like pairing it with complementary flavors and textures. My red velvet fudge practically begs for a steaming cup of coffee or tea to balance its richness.
Can you imagine that creamy fudge melting slightly while you sip a bold espresso? Divine.
For special occasions, I serve small squares alongside fresh berries or a scoop of vanilla ice cream.
The tartness cuts through the sweetness perfectly. A glass of cold milk, champagne for celebrations, or even a dessert wine works beautifully too.
These pairings transform a simple fudge into a memorable dessert experience.
Leftovers and Storage for this Irresistible Red Velvet Fudge
After enjoying your fudge with those perfect pairings, you’ll likely have some squares left over. Don’t worry, this rich treat stores beautifully for up to two weeks when kept in an airtight container in the refrigerator.
For longer storage, I recommend wrapping individual pieces in wax paper before placing them in a freezer-safe container.
They’ll stay delicious for up to three months this way. Just thaw in the fridge overnight when a craving strikes.
Remember to separate layers with parchment paper to prevent sticking. The fudge tastes even better after it’s had time to meld those red velvet flavors together. Isn’t patience rewarding sometimes?
Irresistible Red Velvet Fudge Substitutions and Variations
While the classic red velvet fudge recipe is divine on its own, you can easily customize it to suit dietary needs or simply to try new flavor combinations.
For dairy-free options, swap in coconut condensed milk and dairy-free white chocolate chips. Can’t find red velvet cake mix? Regular vanilla cake mix with a tablespoon of cocoa powder and red food coloring works perfectly.
I’m particularly fond of adding mix-ins like cream cheese chips, chopped Oreos, or toasted pecans. Want something more decadent? Try drizzling melted dark chocolate on top before chilling. Who doesn’t love a chocolate-on-chocolate moment?
Final Thoughts
Three key reasons make this red velvet fudge a standby in my recipe collection. First, it’s ridiculously quick to make—perfect for last-minute guests or sudden sweet cravings.
Second, that vibrant red color makes any dessert platter pop with minimal effort. Third, the creamy texture with hints of cocoa flavor is simply irresistible.
Remember to line your pan with parchment paper hanging over the edges. Trust me, your future self will thank you when it’s time for cleanup. And don’t rush the chilling process—patience yields those perfect, clean-cut squares that look like they came from a candy shop.
If you enjoy quick dessert recipes, you might also appreciate making spice cake mix pumpkin bread that requires just a few ingredients and minimal effort.