I make this no-bake chocolate peanut butter pie when I need something simple that still feels like a real treat. It comes together without turning on the oven, which makes it perfect for busy days or warmer afternoons.
The combination of chocolate and peanut butter is always a favorite in my home, and this pie brings those flavors together in a smooth, creamy way. It’s one of those desserts that disappears quickly once it’s served.
I started making this pie when I wanted a reliable dessert that didn’t require much planning ahead. It quickly became a go-to because the steps are easy and the results are consistent every time.
The filling sets beautifully in the fridge, and the texture stays soft and rich without being too heavy. It’s a recipe I keep coming back to when I want something dependable and crowd-pleasing.
Why You’ll Love This Recipe
This no-bake chocolate peanut butter pie is loved for how easy it is to prepare while still delivering a rich, dessert-like flavor. You don’t need any special baking skills, and the process is simple enough to follow even on a busy day. The creamy peanut butter filling paired with a smooth chocolate layer creates a balance that feels indulgent without being overwhelming.
Another reason this recipe stands out is how well it fits into everyday family life. Since it doesn’t require baking, it’s a great option for involving kids in the kitchen. They can help mix, layer, and assemble the pie, making it a fun and low-stress activity.
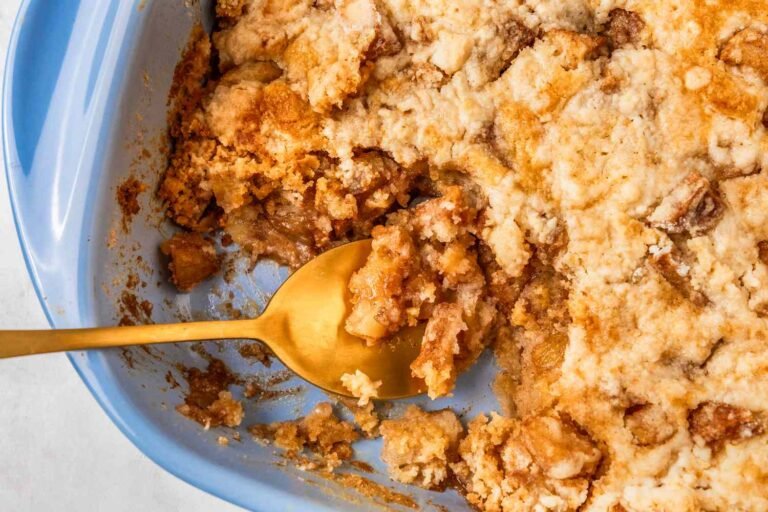
The texture is one of the best parts, with a soft, creamy filling that slices cleanly after chilling. It’s firm enough to hold its shape but still smooth with every bite. This makes it perfect for serving at gatherings or enjoying as a simple dessert at home.
Serves: 8 people
This pie serves about eight people, depending on how you slice it. The portions are rich, so even smaller slices feel satisfying. It’s easy to stretch for a crowd by serving thinner pieces or adding a simple topping.
Ingredients You’ll Need
For the crust:
- 1 ½ cups chocolate cookie crumbs
- 5 tablespoons unsalted butter, melted
For the filling:
- 1 cup creamy peanut butter
- 8 oz cream cheese, softened
- 1 cup powdered sugar
- 1 teaspoon vanilla extract
- 1 cup heavy whipping cream
For the chocolate topping:
- 1 cup semi-sweet chocolate chips
- ½ cup heavy cream
Optional toppings:
- Whipped cream
- Chopped peanuts
- Chocolate shavings
Pro Tips
Make sure the cream cheese is fully softened before mixing. This helps create a smooth filling without lumps and makes blending much easier.
Use a good-quality peanut butter for the best flavor and texture. Avoid overly oily or natural varieties that separate, as they can affect how the filling sets.
Chill the crust for at least 10–15 minutes before adding the filling. This helps it firm up and hold together when slicing.
Whip the cream until soft peaks form before folding it into the peanut butter mixture. This step gives the pie a light and airy texture.
Let the pie chill for several hours or overnight for the best results. The longer it sets, the cleaner the slices will be when serving.
When melting chocolate, heat it gently with the cream to avoid burning. Stir slowly until smooth for a glossy, even topping.
Tools You’ll Need
- 9-inch pie dish
- Mixing bowls
- Electric mixer or hand mixer
- Rubber spatula
- Measuring cups and spoons
- Saucepan or microwave-safe bowl
- Whisk
Substitutions and Variations
Use a Different Crust
Swap the chocolate cookie crust for a graham cracker crust if you prefer a lighter base. This creates a slightly less rich flavor while still holding the filling well.
Make It Dairy-Free
Use dairy-free cream cheese, coconut cream, and dairy-free chocolate chips. The texture stays creamy with a slightly different flavor profile.
Switch the Nut Butter
Try almond butter or cashew butter in place of peanut butter. This changes the flavor while keeping the same smooth consistency.
Add Extra Chocolate Flavor
Mix mini chocolate chips into the filling before chilling. This adds small bursts of chocolate throughout each slice.
Make It Lighter
Use a reduced-fat cream cheese and fold in whipped topping instead of heavy cream. This creates a slightly lighter texture while keeping the dessert satisfying.
Make Ahead Tips
This no-bake chocolate peanut butter pie is ideal for preparing ahead, especially when you want to plan desserts without last-minute work. You can make the entire pie a day in advance and keep it covered in the refrigerator until ready to serve. This resting time actually improves the texture and helps the layers set more cleanly.
If you want to prepare even earlier, you can make the crust and filling separately and store them in the refrigerator. Assemble the pie when you’re ready, then allow enough time for it to chill and firm up. This approach helps break the process into smaller, manageable steps.
For longer storage, the fully assembled pie can also be frozen without the toppings. Wrap it tightly in plastic wrap and foil, then freeze for up to one month. Thaw it overnight in the refrigerator before serving for the best consistency.
Instructions
Step 1: Prepare the Crust
In a mixing bowl, combine the chocolate cookie crumbs and melted butter until evenly coated. Press the mixture firmly into the bottom and sides of a 9-inch pie dish to form an even crust.
Step 2: Chill the Crust
Place the crust in the refrigerator for 10–15 minutes to firm up. This step helps it hold together when the filling is added.
Step 3: Mix the Filling Base
In a large bowl, beat the softened cream cheese and peanut butter together until smooth and creamy. Add the powdered sugar and vanilla extract, then continue mixing until fully combined.
Step 4: Whip the Cream
In a separate bowl, whip the heavy cream until soft peaks form. This will help create a light and airy texture in the filling.
Step 5: Combine the Filling
Gently fold the whipped cream into the peanut butter mixture using a spatula. Mix just until combined to keep the filling light and smooth.
Step 6: Fill the Pie
Spoon the filling into the chilled crust and spread it evenly. Smooth the top with a spatula to create a clean surface.
Step 7: Prepare the Chocolate Topping
In a small saucepan or microwave-safe bowl, heat the chocolate chips and heavy cream together. Stir until the mixture is fully melted and smooth.
Step 8: Add the Topping
Pour the chocolate mixture over the filling and spread it gently to cover the surface. Work slowly to avoid mixing it into the filling layer.
Step 9: Chill the Pie
Place the pie in the refrigerator and chill for at least 4–6 hours, or until fully set. Overnight chilling will give the best results.
Step 10: Slice and Serve
Once set, slice the pie using a sharp knife, wiping it clean between cuts for neat slices. Add optional toppings like whipped cream or chopped peanuts before serving.
Serving Suggestions
This pie is rich and satisfying, so it works best when served in moderate slices that let the flavors shine without feeling too heavy. It pairs well with a simple cup of coffee or a glass of cold milk, which helps balance the sweetness and creamy texture. The smooth layers and chocolate topping make it appealing for both casual family meals and small gatherings.
You can also dress it up slightly for special occasions by adding a swirl of whipped cream or a sprinkle of chopped peanuts just before serving. These small touches add a bit of texture and make each slice feel a little more complete. It’s a dessert that adapts easily depending on how you want to present it.
For a more relaxed setting, serve it straight from the pie dish with minimal toppings. It still holds its shape well and looks inviting without extra effort. This flexibility makes it easy to fit into different moments without changing the core recipe.
Leftovers and Storage
Leftovers of this no-bake chocolate peanut butter pie store very well, making it a practical dessert to keep on hand. Cover the pie tightly with plastic wrap or transfer slices to an airtight container before placing them in the refrigerator. It will stay fresh for up to four days while maintaining its creamy texture.
When serving leftovers, you can enjoy them straight from the fridge or let them sit at room temperature for a few minutes for a slightly softer texture. The filling remains stable, so it won’t lose its shape easily. This makes it convenient for quick snacks or desserts throughout the week.
If you need to store it longer, freezing is a good option. Wrap individual slices or the whole pie securely to prevent freezer burn, then store for up to one month. Thaw overnight in the refrigerator before serving to preserve the smooth texture.
Nutrition and Benefits
- This dessert provides a source of protein from the peanut butter and cream cheese, helping it feel more satisfying than many lighter sweets. It offers a balanced richness that can help curb cravings in smaller portions.
- The peanut butter adds healthy fats that contribute to a creamy texture and lasting fullness. These fats also help carry the flavor throughout each bite.
- Using simple, recognizable ingredients allows you to control the overall quality of the dessert. This makes it a more thoughtful alternative to store-bought options.
- The no-bake preparation helps preserve the natural flavors of the ingredients. It also avoids the need for added oils or extended cooking processes.
- When enjoyed in moderation, this pie fits into a balanced lifestyle as an occasional treat. Its richness means a little goes a long way, making it easy to portion.
Recipe FAQ
Can I use a store-bought crust instead of making one?
Yes, a store-bought chocolate or graham cracker crust works well if you want to save time. It provides the same structure and allows you to focus on the filling and topping. Just make sure it’s a standard 9-inch size for the best fit.
How do I know when the pie is fully set?
The pie is ready when the filling feels firm to the touch and holds its shape when sliced. It should not jiggle in the center when gently moved. Chilling it overnight gives the most reliable results.
Can I make this pie without a mixer?
Yes, but it will require a bit more effort. You can mix the filling by hand using a whisk or sturdy spoon, making sure the cream cheese is very soft. Whipping the cream by hand will take longer but can still be done.
What type of peanut butter works best?
Creamy, regular peanut butter works best for a smooth and stable filling. Natural peanut butter can be used, but it should be well stirred to avoid separation. Consistency is key for the right texture.
Can I make this pie gluten-free?
Yes, simply use gluten-free chocolate cookies for the crust. The filling and topping ingredients are naturally gluten-free in most cases. Always check labels to be sure.
Why is my filling too soft?
A soft filling usually means it hasn’t chilled long enough or the whipped cream was under-whipped. Make sure to chill the pie for several hours and whip the cream to soft peaks. This helps the filling hold its shape.
Can I add layers or mix-ins to the filling?
Yes, you can fold in chocolate chips, crushed cookies, or chopped nuts for added texture. Keep the additions balanced so they don’t overwhelm the filling. This allows you to customize the pie while keeping its structure intact.
A Rich and Simple Dessert to Make Again
This no-bake chocolate peanut butter pie is a dependable dessert that brings together ease and flavor in a way that fits everyday life. It requires minimal effort while still delivering a smooth, rich texture that feels complete and satisfying. The familiar combination of chocolate and peanut butter makes it a natural favorite for families.
It’s also a recipe that works well for planning ahead, sharing, or enjoying over several days without losing its appeal. With simple ingredients and consistent results, it’s the kind of dessert you can return to whenever you want something reliable. Its balance of convenience and flavor makes it worth making again.