I make these no-bake Oreo peanut butter truffles when I want something rich, sweet, and a little indulgent without turning on the oven. They come together with just a handful of ingredients and a simple mixing process that feels almost effortless.
The combination of crushed Oreos and creamy peanut butter creates a soft, chocolatey center that feels like a small treat you can keep on hand. I like making a batch to store in the fridge for quick snacks during the week.
In my kitchen, this has become one of those recipes that feels both fun and practical. It doesn’t require baking, and the steps are easy enough to do with kids or on a busy afternoon.
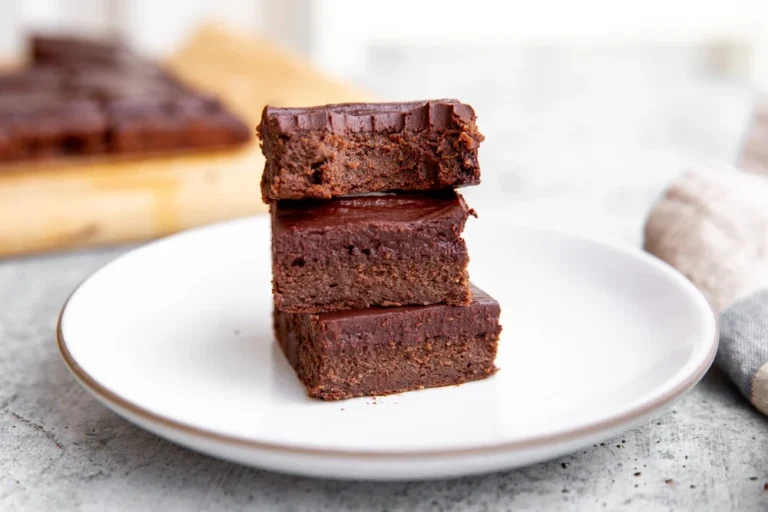
The texture is smooth and fudgy inside, with a chocolate coating that gives it a satisfying bite. Once you make them, they tend to disappear quickly.
Why You’ll Love This Recipe
These no-bake Oreo peanut butter truffles have a rich, creamy center made from crushed cookies and peanut butter. The flavor is deep and chocolatey with a slight nutty balance that makes each bite smooth and satisfying. They feel like a dessert you might find in a bakery, but they are very simple to make at home.
They are also incredibly easy to prepare, which makes them perfect for beginners or quick dessert needs. There is no baking required, and everything comes together in one bowl. These no-bake Oreo peanut butter truffles are quick to mix, roll, and chill.
Another reason they are so popular is their versatility. You can coat them in different types of chocolate or add toppings like crushed cookies or sprinkles. These no-bake Oreo peanut butter truffles fit easily into everyday desserts, holiday trays, or simple sweet cravings.
Serves: 12 people
This recipe makes about 12 to 16 truffles depending on size. You can make them smaller for bite-sized treats or larger for a more indulgent snack. It is easy to double the batch if needed.
Ingredients You’ll Need
- 2 cups Oreo cookies, finely crushed
- 1/2 cup creamy peanut butter
- 4 ounces cream cheese, softened
- 1/2 cup powdered sugar
- 1/2 teaspoon vanilla extract
- 1 1/2 cups chocolate chips (milk or semi-sweet)
- 1 teaspoon coconut oil or butter (for melting chocolate)
- Crushed Oreos or sprinkles for topping (optional)
Pro Tips
- Crush the Oreos into fine crumbs so the mixture binds smoothly. Large chunks can make rolling harder.
- Make sure the cream cheese is fully softened before mixing. This helps create a smooth, lump-free filling.
- Chill the mixture before rolling if it feels too soft or sticky. This makes shaping much easier.
- Use a small scoop for even-sized truffles. This helps them chill and coat evenly.
- Melt the chocolate slowly to avoid burning. Stir often for a smooth coating.
- Work quickly when dipping so the chocolate sets evenly without clumping.
Tools You’ll Need
- Mixing bowl
- Food processor or rolling pin (for crushing cookies)
- Spatula or spoon
- Baking tray
- Parchment paper
- Microwave-safe bowl or double boiler
- Fork or dipping tool
Substitutions and Variations
Use Crunchy Peanut Butter
Swap creamy peanut butter for crunchy if you want added texture. This gives a slight crunch in the center.
Try Different Oreo Flavors
Use mint, golden, or peanut butter Oreos for a flavor twist. Each variation changes the overall taste.
Make It Dairy-Free
Use dairy-free cream cheese and chocolate. This keeps the truffles creamy while meeting dietary needs.
Skip the Cream Cheese
Replace cream cheese with extra peanut butter for a denser, more fudgy texture. The flavor becomes richer and nuttier.
Add a Crunchy Center
Place a small cookie piece or nut inside each truffle. This adds a surprise texture in the middle.
Make Ahead Tips
These no-bake Oreo peanut butter truffles are ideal for making ahead because they hold their shape well once chilled and actually taste better after resting. The flavors of chocolate, peanut butter, and cookies blend together more as they sit, creating a smoother, richer bite. This makes them perfect for preparing the day before you need them.
You can also prepare the truffle mixture ahead of time and refrigerate it for a few hours before rolling. This helps firm up the dough and makes shaping much easier, especially if your kitchen is warm. Once coated and chilled, they store beautifully for several days, making them a reliable make-ahead dessert.
Instructions
Step 1: Crush the Oreos
Place the Oreo cookies in a food processor and blend until they turn into fine crumbs. If you don’t have a processor, place them in a sealed bag and crush them with a rolling pin. The crumbs should be fine with no large chunks.
Step 2: Make the Truffle Base
In a large mixing bowl, combine the crushed Oreos, softened cream cheese, peanut butter, powdered sugar, and vanilla extract. Mix until everything is fully combined and forms a thick, sticky dough. The texture should be smooth and easy to shape.
Step 3: Adjust the Texture if Needed
If the mixture feels too soft, add a small amount of extra Oreo crumbs. If it feels too dry, add a little more peanut butter or cream cheese. Adjust gradually until the dough holds together when pressed.
Step 4: Chill the Mixture
Place the bowl in the refrigerator for 20 to 30 minutes. This helps firm up the mixture and makes rolling easier. Chilling is especially helpful if the dough feels sticky.
Step 5: Roll into Balls
Scoop small portions of the chilled mixture and roll them into even balls using your hands. Try to keep them uniform in size so they chill and coat evenly. Place them on a parchment-lined tray.
Step 6: Melt the Chocolate
In a microwave-safe bowl or double boiler, melt the chocolate chips with coconut oil or butter. Stir frequently until the mixture is smooth and glossy. Avoid overheating to keep the chocolate silky.
Step 7: Coat the Truffles
Dip each truffle into the melted chocolate using a fork or dipping tool. Let excess chocolate drip off before placing it back on the tray. Work quickly so the coating remains smooth.
Step 8: Add Toppings
While the chocolate is still soft, sprinkle crushed Oreos or sprinkles on top. This adds texture and makes them visually appealing. You can also drizzle extra melted chocolate for decoration.
Step 9: Chill Until Set
Place the coated truffles in the refrigerator for at least 30 to 45 minutes. This allows the chocolate shell to firm up completely. Once set, they are ready to serve.
Serving Suggestions
These no-bake Oreo peanut butter truffles are best served chilled straight from the refrigerator. The cold temperature keeps the chocolate coating firm while the inside stays soft and creamy. Each bite is rich and satisfying without needing a large portion.
You can serve them on a dessert platter as part of a snack or party spread. Their small size makes them easy to pick up and share. They also work well in paper candy cups for a neat presentation.
For a slightly more decorative option, drizzle them with white chocolate or extra melted chocolate before serving. A sprinkle of crushed cookies on top adds a simple finishing touch. These small details make them feel more special without extra effort.
They also pair well with coffee, milk, or hot chocolate. The sweetness of the truffles balances nicely with warm drinks. This makes them a comforting treat for both kids and adults.
Leftovers and Storage
Store leftover no-bake Oreo peanut butter truffles in an airtight container in the refrigerator. They will stay fresh for up to one week when properly stored. Keeping them chilled helps maintain their shape and texture.
If stacking the truffles, place parchment paper between layers to prevent sticking. This helps keep the chocolate coating intact and makes them easier to serve later. It also prevents smudging or melting.
These truffles can also be frozen for longer storage. Place them in a freezer-safe container and separate layers with parchment paper. They can be frozen for up to two months.
To enjoy from frozen, let them sit at room temperature for a few minutes or thaw in the refrigerator. They soften slightly but still hold their shape well. This makes them a convenient make-ahead dessert option.
Nutrition and Benefits
- These no-bake Oreo peanut butter truffles use simple ingredients that are easy to prepare at home. This makes them a convenient homemade treat.
- The portion size is small, which helps with mindful snacking. They are rich enough that a little goes a long way.
- Making them at home allows you to control sweetness and ingredient quality. This gives more flexibility than store-bought sweets.
- Peanut butter adds a source of protein and healthy fats, making the truffles more satisfying. This helps balance the sweetness.
- The no-bake method saves time and avoids using the oven, making it ideal for quick desserts.
Recipe FAQ
Can I use crunchy peanut butter instead of creamy?
Yes, crunchy peanut butter works well and adds extra texture. It creates a slightly chunkier filling but still holds together.
Why is my mixture too soft?
This can happen if there is too much cream cheese or peanut butter. Add more Oreo crumbs to help firm it up. Chilling also helps.
Can I skip the cream cheese?
Yes, you can replace cream cheese with extra peanut butter. This will make the truffles denser and more fudgy.
Can I use different Oreo flavors?
Yes, you can use mint, golden, or flavored Oreos. Each one gives a slightly different taste profile.
How do I keep the chocolate coating smooth?
Melt the chocolate slowly and stir often. Avoid overheating, as this can cause it to thicken or seize.
Can I make these ahead of time?
Yes, these truffles are perfect for making ahead. They actually taste better after chilling for a few hours or overnight.
Can I add fillings inside the truffles?
Yes, you can add small cookie pieces or a bit of peanut butter in the center. This adds a surprise texture inside.
A Rich and Easy No-Bake Treat to Repeat
These no-bake Oreo peanut butter truffles are a simple, satisfying dessert that combines creamy, chocolatey, and nutty flavors in every bite. They are quick to prepare and easy to store, making them perfect for everyday treats or special occasions.
With their rich flavor and simple preparation, they are a recipe you can return to anytime you want a quick homemade dessert that feels indulgent without much effort.