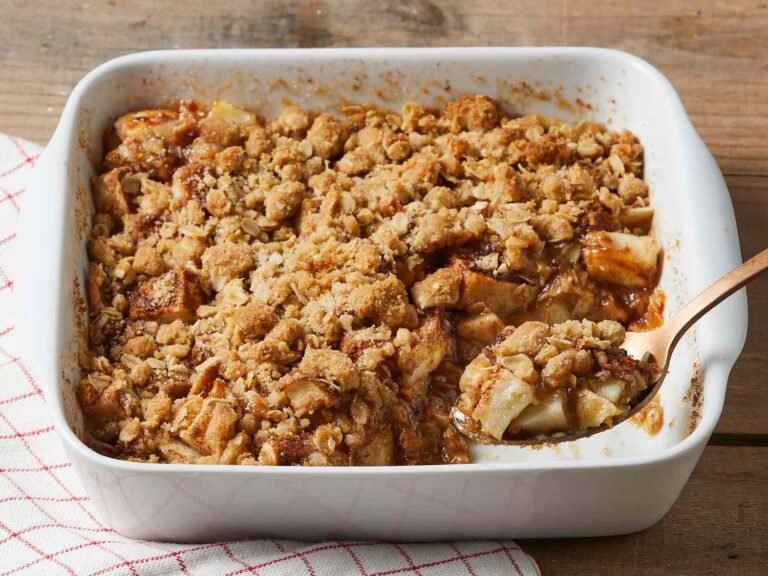
I make these soft maple glazed scones when I want something warm and comforting that still feels simple to prepare. The texture is tender without being too crumbly, and the maple glaze adds just enough sweetness to bring everything together. I like how they come together in one bowl with basic ingredients. It’s a recipe that fits easily into a quiet morning or an afternoon break.
I started making these when I wanted a softer version of traditional scones that didn’t feel too dry. Over time, they became a regular favorite because they’re reliable and easy to adjust. The maple flavor adds a gentle richness that pairs well with the soft texture. It’s one of those recipes I come back to when I want something simple and satisfying.
Why You’ll Love This Recipe
These soft maple glazed scones are a great choice when you want a baked treat that feels comforting but not too heavy. The texture is tender and slightly fluffy, making them easy to enjoy without feeling dense. The maple glaze adds a smooth finish that complements the mild flavor of the scones.
Another reason this recipe works so well is how approachable it is for most home bakers. The ingredients are simple and easy to find, and the steps are straightforward without requiring special techniques. You can mix the dough quickly and shape it without needing much experience.
They’re also versatile enough for different occasions, whether you’re serving them for breakfast, a snack, or sharing with others. The scones hold their shape well and stay soft, making them a dependable option to bake again.
Serves: 8 scones
This recipe makes about 8 scones, depending on how you cut the dough. You can make smaller wedges for lighter portions or slightly larger ones for a more filling option. It’s easy to adjust based on your needs.
Ingredients You’ll Need
For the scones:
- 2 cups all-purpose flour
- ¼ cup granulated sugar
- 1 tablespoon baking powder
- ½ teaspoon salt
- ½ cup unsalted butter, cold and cubed
- ½ cup heavy cream
- 1 large egg
- 1 teaspoon vanilla extract
- ¼ cup pure maple syrup
For the maple glaze:
- 1 cup powdered sugar
- 2–3 tablespoons maple syrup
- 1 tablespoon milk
Pro Tips
- Use cold butter when making the dough. This helps create a tender texture and prevents the scones from becoming dense.
- Don’t overmix the dough. Mix just until it comes together to keep the scones soft.
- Work quickly when handling the dough to keep the butter cold. This helps maintain the right texture during baking.
- Lightly flour your surface when shaping the dough. This prevents sticking and makes handling easier.
- Use a sharp knife to cut the scones cleanly. This helps them rise evenly in the oven.
- Let the scones cool slightly before adding the glaze. This prevents the glaze from melting too much.
Tools You’ll Need
- Baking sheet
- Parchment paper
- Mixing bowls (medium and large)
- Pastry cutter or fork
- Whisk
- Rubber spatula
- Measuring cups and spoons
- Knife
Substitutions and Variations
Use Whole Wheat Flour
Replace part of the all-purpose flour with whole wheat flour. This adds a slightly deeper flavor while keeping the texture soft.
Make It Dairy-Free
Use a dairy-free butter alternative and plant-based cream. This keeps the recipe similar while adjusting for dietary needs.
Add Nuts
Mix in chopped pecans or walnuts. This adds a bit of texture that pairs well with the maple flavor.
Add Cinnamon
Stir in a small amount of cinnamon for extra warmth. This complements the maple without overpowering it.
Make It Less Sweet
Reduce the glaze slightly or use a thinner layer. This keeps the scones balanced while still adding flavor.
Make Ahead Tips
These soft maple glazed scones are easy to prepare ahead, which makes them a good option for busy mornings or planned gatherings. You can mix and shape the dough, then cover and refrigerate it for up to 24 hours before baking. Keeping the dough cold helps maintain the texture and allows the scones to bake up tender.
You can also freeze the unbaked scones after cutting them into wedges. Place them on a tray to freeze, then transfer to a container once firm. When ready to bake, place them directly in the oven and add a few extra minutes to the baking time.
Instructions
Step 1: Preheat and Prepare Baking Sheet
Preheat your oven to 400°F (200°C). Line a baking sheet with parchment paper to prevent sticking and promote even baking. This also makes cleanup easier once the scones are done.
Set the prepared baking sheet aside while you make the dough. Having everything ready helps the process move smoothly. It also keeps the dough from sitting too long.
Step 2: Mix the Dry Ingredients
In a large mixing bowl, whisk together the flour, granulated sugar, baking powder, and salt. This helps distribute the ingredients evenly and prevents clumps. The mixture should look light and uniform.
Make sure everything is well combined before adding the butter. This ensures even texture in the finished scones. Set aside for the next step.
Step 3: Cut in the Butter
Add the cold, cubed butter to the dry ingredients. Use a pastry cutter or fork to mix until the mixture resembles coarse crumbs. Small pieces of butter should still be visible.
Work quickly to keep the butter cold. This step is important for creating a tender texture. The mixture should not be smooth or fully blended.
Step 4: Mix the Wet Ingredients
In a separate bowl, whisk together the heavy cream, egg, vanilla extract, and maple syrup. Mix until smooth and fully combined. This forms the liquid base for the dough.
Make sure the ingredients are evenly blended before adding them to the dry mixture. This helps create a consistent dough. Set aside until ready to combine.
Step 5: Combine and Form the Dough
Pour the wet ingredients into the dry mixture. Stir gently with a spatula until the dough just comes together. It will look slightly rough and not fully smooth.
Turn the dough onto a lightly floured surface and gently press it into a round disc about 1 inch thick. Avoid kneading too much to keep the texture soft. The dough should hold together without being sticky.
Step 6: Cut the Scones
Use a sharp knife to cut the dough into 8 equal wedges. Place the wedges onto the prepared baking sheet, leaving space between each one. This allows them to bake evenly.
If needed, lightly shape the edges so they hold together. Work gently to avoid overhandling the dough. The scones should keep their shape.
Step 7: Bake the Scones
Place the baking sheet in the preheated oven and bake for 15 to 18 minutes. The tops should be lightly golden, and the centers should feel set. Avoid overbaking to keep them soft.
Rotate the baking sheet halfway through baking if needed. This helps ensure even cooking. Keep an eye on them toward the end of the baking time.
Step 8: Glaze and Serve
Remove the scones from the oven and let them cool slightly on the baking sheet. In a small bowl, mix the powdered sugar, maple syrup, and milk to create a smooth glaze. Adjust the consistency if needed.
Drizzle or spread the glaze over the slightly cooled scones. Let it set for a few minutes before serving. The scones are best enjoyed warm or at room temperature.
Serving Suggestions
These maple glazed scones are best served slightly warm, when the texture is soft and the glaze has just set. The mild sweetness and tender crumb make them easy to enjoy without needing additional toppings.
Serve them with a cup of coffee or tea for a simple and balanced pairing. The maple flavor works well with warm drinks without being too strong.
For a more filling option, you can serve them alongside fresh fruit or yogurt. This creates a more complete breakfast or snack without adding much effort.
They also work well for small gatherings or brunch settings. Their simple appearance and soft texture make them easy to share.
If serving later, allow them to cool fully and keep them at room temperature. This helps maintain their texture.
Leftovers and Storage
Store leftover scones in an airtight container at room temperature for up to 2 days. Keeping them sealed helps maintain their softness and prevents them from drying out. Place parchment paper between layers if stacking.
For longer storage, refrigerate the scones for up to 4 days. Let them come to room temperature before serving for the best texture. This helps restore their softness.
You can also freeze the scones without glaze for up to one month. Wrap them tightly and store in a freezer-safe container. Add the glaze after thawing for the best result.
To thaw, let the scones sit at room temperature for a few hours. You can warm them slightly in the oven if desired. Avoid overheating to prevent them from becoming dry.
If the glaze softens during storage, you can let the scones sit uncovered briefly to help it set again. This keeps the finish clean.
Nutrition and Benefits
- These scones provide a balanced baked treat with a soft texture and mild sweetness. They can be enjoyed in smaller portions without feeling too heavy.
- Maple syrup adds natural sweetness along with a small amount of minerals. This contributes to both flavor and a slight nutritional benefit.
- Making them at home allows you to control ingredients and adjust sweetness if needed. This can be helpful for personal preferences.
- The simple ingredient list makes this recipe easy to repeat without needing specialty items. It’s practical for everyday baking.
- The combination of soft texture and light glaze creates a comforting treat that works well for breakfast or snacks.
Recipe FAQ
Why are my scones too dense?
Dense scones are usually caused by overmixing the dough or using butter that is too warm. Mix gently and keep the butter cold for best results. This helps create a lighter texture.
Can I use milk instead of heavy cream?
Yes, milk can be used, but the texture may be slightly less rich. Heavy cream helps create a softer crumb. Both options will still work.
How do I keep the scones soft?
Store them in an airtight container and avoid overbaking. Slightly underbaking helps maintain a tender texture. Proper storage also helps retain moisture.
Can I make smaller scones?
Yes, you can cut the dough into smaller pieces. Just reduce the baking time slightly and watch them closely. This helps ensure even baking.
Can I skip the glaze?
Yes, the scones can be served without glaze for a lighter option. They will still have a soft texture and mild flavor. The glaze simply adds extra sweetness.
Why did my scones spread too much?
This can happen if the butter was too warm or the dough was too soft. Chilling the dough briefly before baking can help. Proper measurements also make a difference.
Can I add other flavors?
Yes, you can add a small amount of cinnamon or mix in nuts. These additions pair well with the maple flavor. Keep them balanced for best results.
A Warm and Comforting Bake to Make Again
These soft maple glazed scones come together in a simple way that feels easy to manage for both everyday baking and special mornings. The tender texture and light maple flavor create a comforting treat that’s easy to enjoy.
They’re a dependable option for making ahead, sharing, or serving fresh without extra effort. Once you’ve made them, they naturally become a recipe you return to when you want something soft, simple, and worth baking again.